Step 1 of 13
1
Open PLUS+1 GUIDE CANKing
Find PLUS+1 GUIDE CANKing in your Windows Start Menu or on your Desktop. The icon looks like this:

⚠️ If you get an error when opening:
Close the error, then right-click the CANKing icon and select "Run as Administrator". Admin privileges are often required to run and install this software. If the problem continues, contact your IT department.
🔧 Troubleshooting — Opening CANKing
→Right-click the icon and select Run as Administrator — this resolves most launch errors.
→If you see "missing DLL" or similar errors, the installation may be incomplete. Try reinstalling from the PLUS+1 Update Center.
→Contact your IT department if admin privileges are blocked on your computer.
Still stuck? Call EZ TRAC Service at (844) 289-3987 and we can walk you through it.
2
Warning Screen
The first thing you will see is a warning about connecting to a live CAN system. This is normal — click "OK, I know what I'm doing" to proceed.
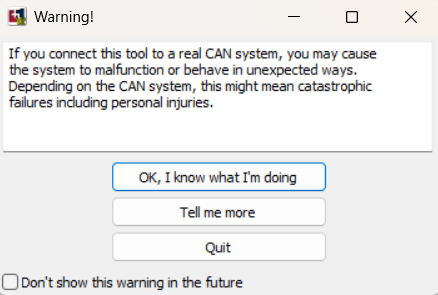
Click "OK, I know what I'm doing" to proceed
3
Create New Project
Next you will see the Create a New Project dialog. Leave Template selected — it is already the default. Click OK.
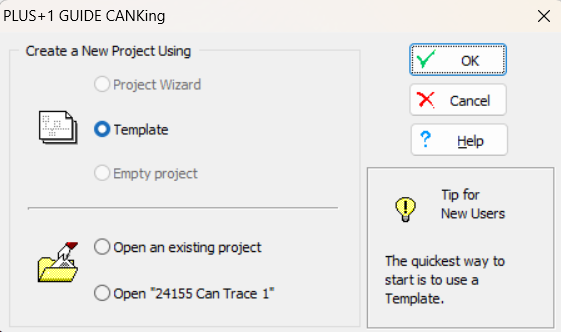
Leave "Template" selected and click OK
4
Select Template
The Templates dialog will open. Leave CAN Kingdom Basic selected — it is already highlighted by default. Click OK.
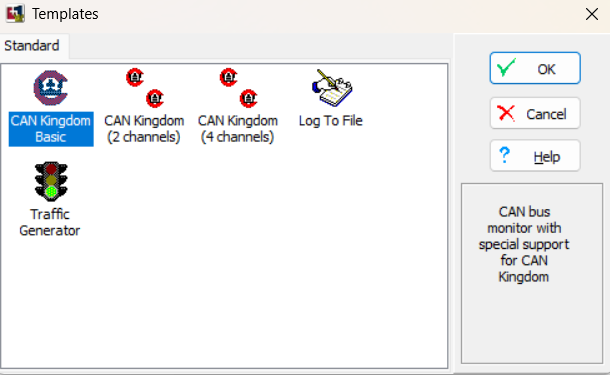
Leave "CAN Kingdom Basic" selected and click OK
5
Tip of the Day
A Tip of the Day dialog will appear. Click OK to dismiss it. If you don't want to see it every time you open CANKing, uncheck "Show tips at startup" before clicking OK.
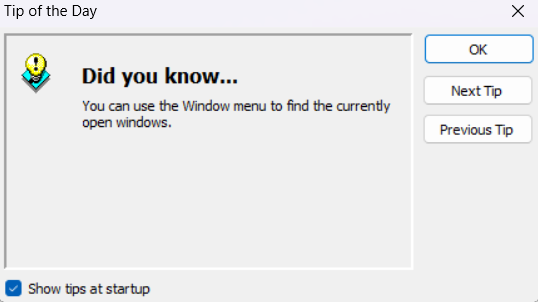
Click OK — optionally uncheck "Show tips at startup" to disable this in the future
6
Your Workspace — Four Windows
CANKing will open with four windows. All of them can be moved and resized — arrange them however works best for your screen.
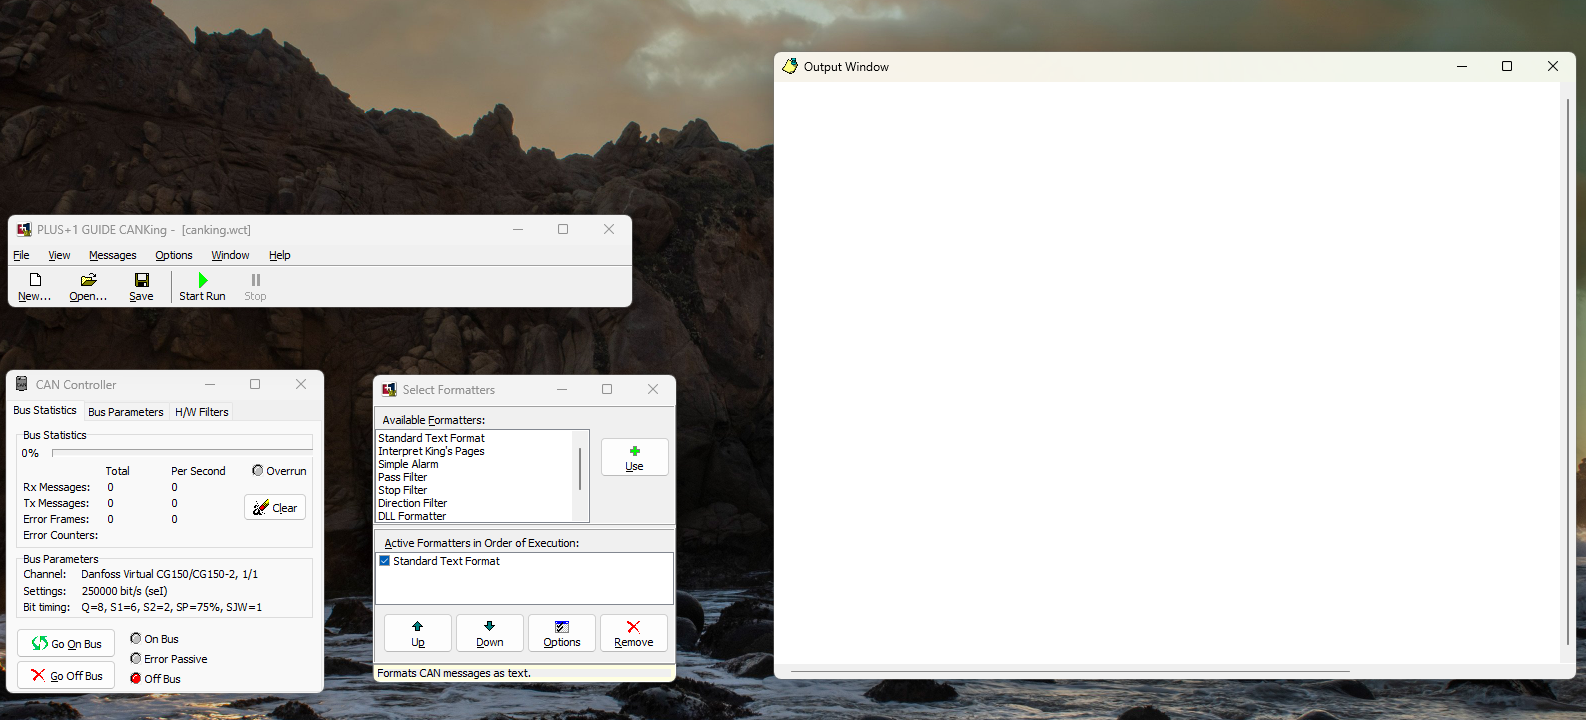
The four windows: Main toolbar, CAN Controller, Select Formatters, and Output Window
1
PLUS+1 GUIDE CANKing — main toolbar with New, Open, Save, Start Run, and Stop buttons.
2
CAN Controller — shows bus statistics and parameters. Has Go On Bus / Go Off Bus buttons. This is where you set baud rate and select your adapter.
3
Select Formatters — controls how CAN data is displayed in the Output Window. We will configure this shortly.
4
Output Window — where your live CAN trace data appears. Make this window as large as possible — you want to see as many lines as possible at once.
7
Set Fixed Positions in Output Window
Do this first before going on the bus. Right-click anywhere inside the Output Window and select Fixed Positions.
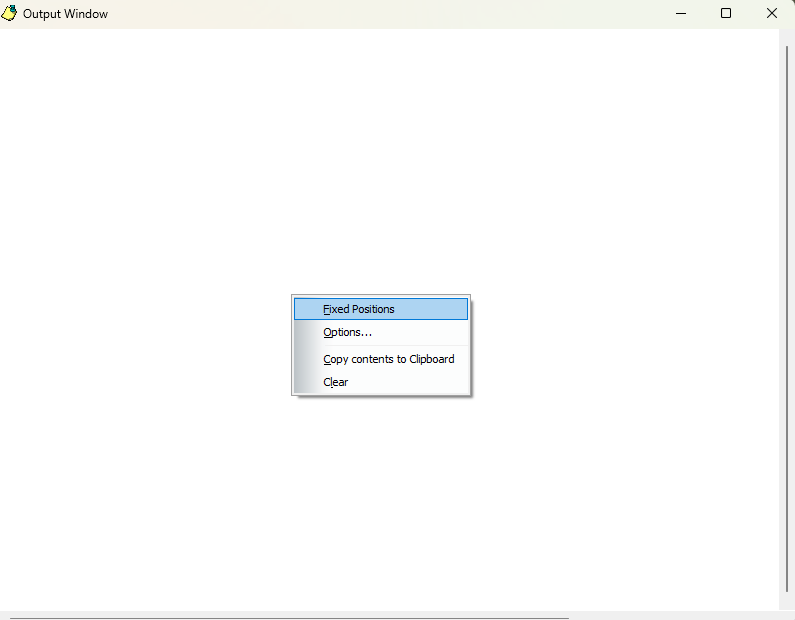
Right-click in the Output Window and select "Fixed Positions"
Why Fixed Positions?
Without it, the CAN data scrolls past in real time — too fast to read. With Fixed Positions enabled, each message stays in its own row and just updates in place as values change. You can scroll through the list and watch signals change live without the data flying past you.
8
Set Simple J1939 Format
In the Select Formatters window, you need to switch the output format to Simple J1939. This makes the data readable and consistent with the EZ TRAC signal decoders.
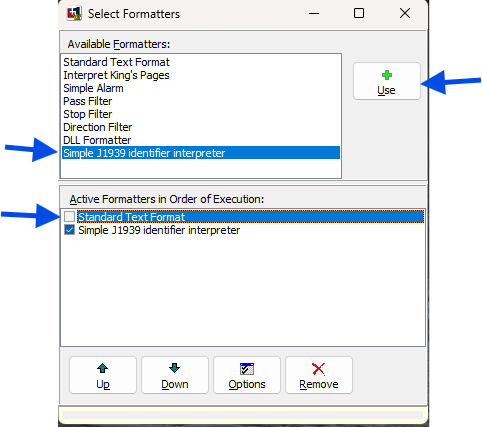
Three steps: (1) Click Simple J1939 identifier interpreter, (2) click Use, (3) uncheck Standard Text Format
1
In the Available Formatters list, click Simple J1939 identifier interpreter to select it.
2
Click the Use button (green + icon). It will appear in the Active Formatters list below.
3
Uncheck Standard Text Format in the Active Formatters list. Only Simple J1939 identifier interpreter should be checked.
9
Select Your CAN Adapter
In the CAN Controller window, click the Bus Parameters tab. Click the CAN Channel dropdown and select your adapter.
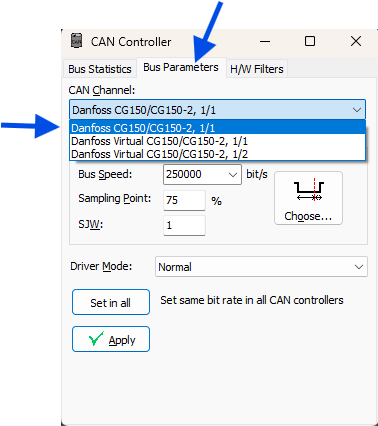
Click Bus Parameters tab → click the CAN Channel dropdown → select your adapter
💡 Your adapter must be plugged in to appear in the dropdown list. If you don't see it, check the USB connection and try again. For Danfoss hardware select Danfoss CG150. For Kvaser hardware select your Kvaser Leaf Light adapter.
🔧 Troubleshooting — Adapter Not Showing
→Make sure your adapter is plugged into the USB port before opening the dropdown.
→Try a different USB port on your computer.
→Verify the CG150 driver is installed. If not, go back to the Install section.
→Try closing and reopening CANKing with Run as Administrator.
Still stuck? Call EZ TRAC Service at (844) 289-3987 and we can walk you through it.
10
Set the Bus Speed (Baud Rate)
Still in Bus Parameters, click the Bus Speed dropdown and select the correct baud rate. Then click Apply.
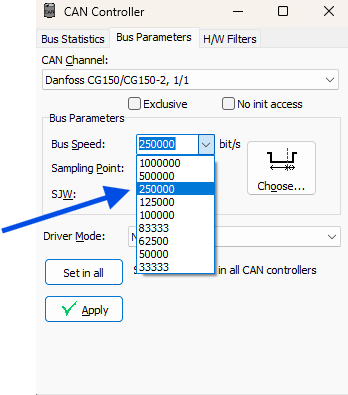
Select 250000 for J1939 (most trucks) — click Apply when done
1
Select 250000 for J1939 vehicle data link — this is correct for most trucks.
2
Select 500000 if you know this truck runs at 500k baud.
3
Click Apply to save the setting.
💡 Not sure which baud rate? Start with 250000. If you go online and see error frames showing up in the Output Window, you are on the wrong baud rate. Click Go Off Bus, switch to 500000, click Apply, and try again.
11
Go On Bus — Start the Trace LIVE
In the CAN Controller window, click the Go On Bus button. The button should turn green and live CAN data will begin appearing in the Output Window.
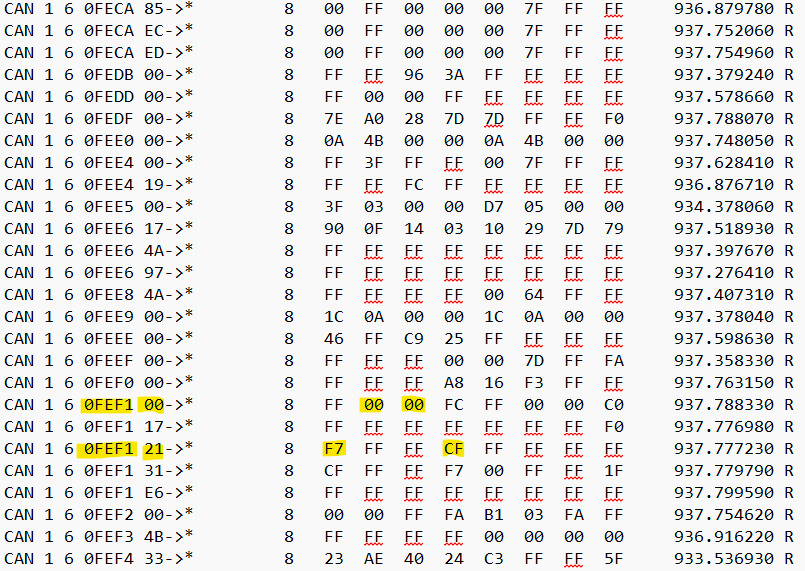
Live CAN trace — scroll to find 0FEF1 lines. Watch Park Brake, Service Brake and VBWS values change in real time as you operate the truck.
✅ What you should see: The Output Window fills with rows of CAN messages. Each row stays in place (Fixed Positions) and updates as values change. Scroll down to find 0FEF1 for brake and vehicle speed signals.
💡 Try it live: Apply and release the park brake — watch the value in the 0FEF1 row change. Press the service brake pedal — watch another byte change. Start the engine — watch RPM values appear in the 0F004 row.
🔧 Troubleshooting — No Data or Error Frames
→No data at all: Verify the adapter is plugged in, the correct channel is selected, and the truck ignition is on.
→Error frames showing: You are likely on the wrong baud rate. Click Go Off Bus, switch to 500000 (or 250000 if you were on 500000), click Apply, and try Go On Bus again.
→Go On Bus button won't turn green: Try closing CANKing and reopening with Run as Administrator.
→Admin privileges: Many computers require admin rights to access USB hardware devices. Contact your IT department if needed.
Still stuck? Call EZ TRAC Service at (844) 289-3987 and we can walk you through it.
12
Find Your Signals
Now that you have a live trace running, scroll through the Output Window and find the PGN lines you need. Use the Signal Help decoders in this app to identify the correct Source Address for each signal.
1
Scroll the Output Window to find 0FEF1 — this is the CCVS message containing Park Brake, Service Brake, and Vehicle Speed.
2
Look for 0F004 for Engine RPM, 0F003 for Accelerator Pedal, 0F002 for Transmission Shaft Speed, and 0F005 for Gear information.
3
Note the Source Address (SA) — the hex number before the →* — for each signal you need. Use the Signal Help decoders to confirm and convert to decimal.
💡 Pro tip: With Fixed Positions on, operate the truck while watching the screen. Apply the park brake, press the service brake, blip the throttle — you will see the exact bytes change in real time, confirming you have the right signals.
13
Save Your Trace
When you are done, save a copy of the trace so you can refer back to it later without having to reconnect to the truck.
1
Right-click anywhere in the Output Window.
2
Select "Copy contents to Clipboard" from the menu.
3
Open Notepad (search for it in your Windows Start Menu).
4
Press Ctrl+V to paste the trace data into Notepad.
5
Press Ctrl+S to save. Name the file with the truck VIN or job number so you can find it later.
✅ Why save it? A saved trace lets you decode signals offline, share it with EZ TRAC support, and refer back without reconnecting to the truck. It takes 30 seconds and can save hours of troubleshooting later.
🔧 General Troubleshooting
→Admin privileges: If you have trouble installing, launching, or connecting — right-click CANKing and select Run as Administrator. This resolves the majority of issues.
→Error messages on launch: Try Run as Administrator first. If errors persist, contact your IT department — your company may restrict USB device access.
→Error frames in trace: Wrong baud rate. Switch between 250000 and 500000 until error frames disappear.
→No signals found: Verify the truck ignition is on, the adapter is connected to the correct CAN connector, and you are on the vehicle data link (not a proprietary engine bus).
Still stuck? Call EZ TRAC Service at (844) 289-3987 and we can walk you through it.
You're a CAN Trace Pro!
You have successfully captured a live J1939 CAN trace using Danfoss CAN King. Your trace is saved and your signals are identified.
✅ What's Next?
1
Use the Signal Help decoders to identify the correct SA decimal values for your display parameters.
2
Enter the SA values into your EZ TRAC display parameters using the Software Resources tool.
3
Keep your saved Notepad trace file handy — if you ever need support, send it to EZ TRAC at (844) 289-3987 and we can decode it for you.